|
Cutting Acrylic
Acrylic sheet continues
to be one of the most
popular materials used
by distributors and fabricators
in the US today. From
the distributor or fabricators
perspective, providing accurate
acrylic parts with a quality
edge finish is important
due to the visual requirements
for the end application.
While there are a number
of methods available,
sawing is the most frequently
used process for sizing
acrylic sheet material.
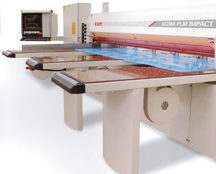
There are three basic types of equipment used for sawing
plastic sheet: table saws, vertical saws and automated panel
saws. Table saws and vertical saws are limited to cutting single
sheets, while an automated panel saw is designed to
process stacks of acrylic sheets. In addition to automating
the cutting process, panel saws can provide higher accuracy
and better edge quality for acrylics due to machine design
and advanced features. In consideration of these points, we
will focus this discussion on automated panel saws. Ranging
from the thinnest extruded acrylic to the thickest cast
acrylic, there are a number of key factors to consider when
cutting acrylic with an automated panel saw.
Tooling
We begin with tooling (saw
blades) because it is the
heart of the sawing process.
The correct blade must be
selected for cutting the
acrylic or the results will not
be successful regardless of
the sawing equipment. Saw
blades vary in tooth geometry,
number of teeth, width of
blade, rpm speed and other
factors depending on the specific
job requirements. Selecting
a smaller diameter blade
that allows for up to a 1.25
inch projection over the top sheet will cost less and produce
a slower tip speed which will result in less burning.
Saw manufacturers and saw blade vendors can assist you
in selecting the correct tool for your specific acrylic needs.
Blade Speed
Using an inverter to control the blade rpm can improve
 the quality of the edge finish by reducing chipping and
melting. In addition, the inverter will enable higher stacks
of acrylic material to be cut at faster speeds which will
increase productivity. Controlling the tip speed of the
blade through blade diameter size on a fixed rpm saw can provide
some flexibility if your
saw does not have an inverter.
Blade Projection
The height that the blade
projects above the acrylic being
cut is important to control chipping,
“blow-out” and melt.
Normally the blade should project
enough so the gullets in the
saw blade can evacuate the
chips to the dust collector.
Raising the blade projection to
as much as 1” over the material
can also help to reduce edge
“blow-out” when stack cutting
thin acrylics. If your saw is not equipped with variable
blade height adjustment, try to control projection through
blade diameter size.
Blade Cooling
Heat buildup within the saw blade can create serious
edge problems when cutting. A fine mist or blown air is
used on some panel saws to cool the main blade during
the acrylic cutting cycle. Lubrication helps to produce a
smoother, cleaner edge and increases blade life.
Cut Speed
Cutting speed for acrylics can
range from below 20 feet per minute
to over 60 feet per minute depending
on acrylic sheet thickness, stack
height, tooling and panel saw features.
State-of-the-art panel saws
with rpm control, variable blade
adjustment, blade cooling and
advanced guide systems ensure that
you can cut at faster speeds, maintaining
productivity without sacrificing
quality.
Other Factors
Vibration created within a panel
saw can be transferred to the acrylic
being cut, causing chipping and overall
poor cut quality. A solid base
design (heavy I-beam type construction)
with a smooth drive system
(rack and pinion) will deliver the
smoothest, most vibration-free cut.
Material hold down is also important.
A pressure beam providing
evenly distributed hold down over
the entire material length is critical
for a good finish. A pressure beam
system with slots can allow the pusher
fence with grippers to maintain
continuous contact on the acrylic
during the cut cycle, ensuring maximum
accuracy on the narrowest
cuts. This is especially
important if you cut small
dimension acrylic parts. Using
a slotted beam system can
improve yield by as much as 6-
8%.
Chip and Dust
Evacuation
Last but certainly not least,
your sawing system for acrylic
should include a good chip
evacuation system. Acrylic
residue remaining in the saw
blade gullet, on the saw table
or in the saw carriage can cause heat and melting problems
resulting in loss of quality and yield. Be sure to provide
your sawing operation with adequate chip removal to
prevent this problem.
Written by Phil Bryant, Business Manager, Plastics
Division for the SCM Group USA. SCM Group USA supplies
Routech 3- and 5-axis CNC Routers and Gabbiani
Panel Saws. For additional information, contact SCM
Group USA, 2475 Satellite Blvd., Duluth, GA 30096,
770-813-8818, Fax: 770-813-8819, E-mail: pbryant@scmgroup-usa.com, Web: www.scmgroup-usa.com.
|