|
Polypropylene Welding Lessons Learned

During the past decade I have been asked to visit
many jobsites, project sites, manufacturing plants,
fabrication facilities and have taught many students
the fine art of Polypropylene welding. The most
unique site was this past fall when I went to Kuwait.
To set the stage, the week before I went to Kuwait I had
just spent 8 days on “North Slope” of Alaska, where it did
get above 32° Fahrenheit. I went back to Florida, packed
my bag for an extended stay in Kuwait where it only drops
below the mid 90s at night.
The project involved fabricating and installing 15 mm
PP liners into steel framed and lined tanks. Each tank was
approx. 39 feet long, 6’ wide and 8.5’ tall. The owner was
able to get PP sheet extruded into 40’ long and 9’ wide
sheets which saved a considerable amount of welding
time. It also presented me with many unique opportunities
to use some creative wisdom and design when it came to
material handling.
PP has a coefficient of expansion equal to 1.8 mm/10°
temperature change per linear meter of sheet stock. All of our
work was done outdoors and every
measurement was corrected back
to an “installed in use temperature”
of approx 20° C. When we arrived
at the project site, the morning
ambient temperature was approx
10-15° C. The sheet temperature,
depending upon it’s location of
standing vertical or still in the material
stack, was always in need of
adjustment based on the actual
material temperature, the future in
use temperature and the ambient
temperature.
For
example,
if the
actual
sheet
temperature
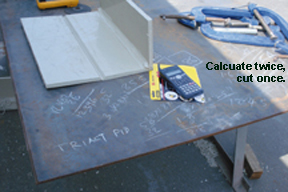
was 13°, the in use temperature was 20° and the cut line
was then adjusted based on the above-mentioned formula.This presented a slight problem until we had everyone trained
to make these adjustments, and then it was checked prior to
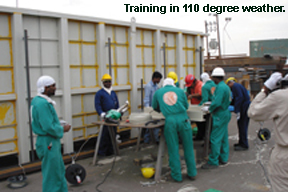
cutting. The meticulousness of the workers I had on this project
was beyond my greatest expectations. They would do the
measuring and the calculations in pairs, and would constantly
consult back with me to see if they were correct.
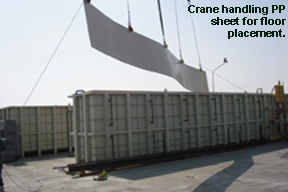
 The sheets, being almost 40 feet in length and 9 feet wide,
required a very large lifting beam with 5 cables holding steel
sheet lifting “dogs” or clamps. Another factor of difficulty was
that the winds were usually 15-25
mph coming from a variety of directions
throughout the day.We had at
our disposal a very large crane with
approximately 75’ of boom, which
made it possible to take the sheet
from the stack, to the vertical panel
saw and then into the tanks without
moving the crane. Four guide ropes
were used to control the sheet.
Cutting these large sheets both
vertically and horizontally was
accomplished by utilizing a modified
panel saw. We mounted a panel
saw on the side of two tanks,
installed a set of lower guides
made out of steel channel, installed
vertical guides at every 6’ along the
80’ of saw runners and used the
crane with the lifting beam to move
the PP sheet through the saw. As
the sheet moved through the saw
we were constantly changing the
cables and lifting “dogs” to make
the horizontal cuts.
Once the cuts were made, the sheet was laid down and
the edges to be welded were chamfered, utilizing a hand
held router. The sheets were then installed, flat sheet on the
bottom, two long sides and then the two ends. To hold the
sheets in place, four steel cages were installed inside the
tank to keep the sheets vertical. Spacers were installed
between the steel tank wall and the PP sheet to compensate
for the expansion which the tank PP liner would experience
when the tank would be at its operating temperature.
During the morning hours, many large spacers were used
but as the day progressed, the temperature increased, thus
some of the spacers had to be removed. Working in extreme
temperature fluctuations, expansion and contraction compensation
was paramount to having a successful project.

Next came the welding. The PP panels were not always
installed in the same day or the same time of the day and
had to be given time to stabilize in temperature prior to
dong any welding. We would install the bottom, one end
and one side panel, we would tack weld them into place,
and run a 4 mm hot gas bead along the bottom and the
end. We would then check our tanks for leaks utilizing a
spark tester. We would then install the other side, adjusting
our spacers to compensate for the temperature
changes, and then the other end, doing the same tack
welding and 4 mm root pass and spark test.
In Kuwait, the average humidity at this time was around
20%, and whole country is sand. Sand was everywhere,
including in the tanks, obviously not by design. We were constantly
using vacuum cleaners to remove the sand as it accumulated
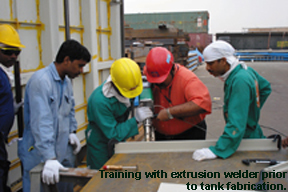
inside our work areas.My welding crew consisted of
a “broom man,” a “vacuum man,” a “scraper man,” a “welding
rod cleaner man” and the Welder. Once the sides, ends
and bottom were tacked in place, we could extrusion weld.
With afternoon temperatures somewhere between 25 and
45 degrees C, it would be assumed that we should be able
to run our 20 mm filet welds in a single pass without getting
any voids due to weld temperature cooling/weld shrinkage.
This was not the case. Now some skeptics will say that the
experienced weld voids (pin holes), plastic worm holes or
whatever, were caused by poor quality welding rod, moisture,
not using the correct extruder, not using the correct welder
technique, not using the correct welder shoe, etc. That was
not the case at all. Just to elaborate a little, we used welding
rod that came to us in sealed plastic bags, less than two
months old and stored in a very dry conex container.
 We
used three different extruders (manufacturers), and there is
no humidity in Kuwait, and to be sure, I myself welded some.
The results were the same. The
solution was very simple, protect
the weld. We put a piece of foil
backed insulation on the weld as
soon as the weld was made and
the voids disappeared.
This is one of those projects
that appeared very straightforward
when based on the drawings
and specifications. But in
actuality, it required the utilization
of all the basics that we
were taught when it comes to welding PP in the field.
Measuring and adjusting for temperatures, cleanliness,
proper equipment utilization, and most of all “Team Work”
is what resulted in success.
I keep waiting for the invitation to come to a project site
to see how well a project has gone, and how perfect all the
welds are.
Written by Larry Rowold, owner and chief instructor of
“The Plastic Welding School,” with its teaching facility
located at 5119 SE 102nd Place, Belleview, FL 32440.
Larry is available for on-site training, classroom training,
project consultation, equipment consultation, etc.
Larry can best be reached on his cell phone 630-319-3480 or email Larry@RREWorld.com. The website for the
school is www.plasticweldingschool.org.
|